|

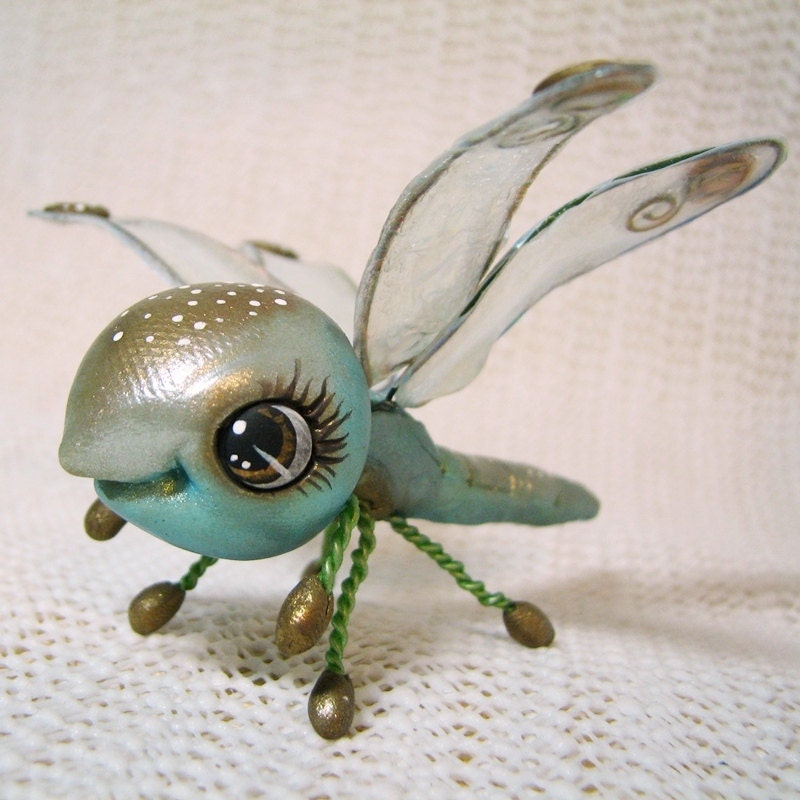
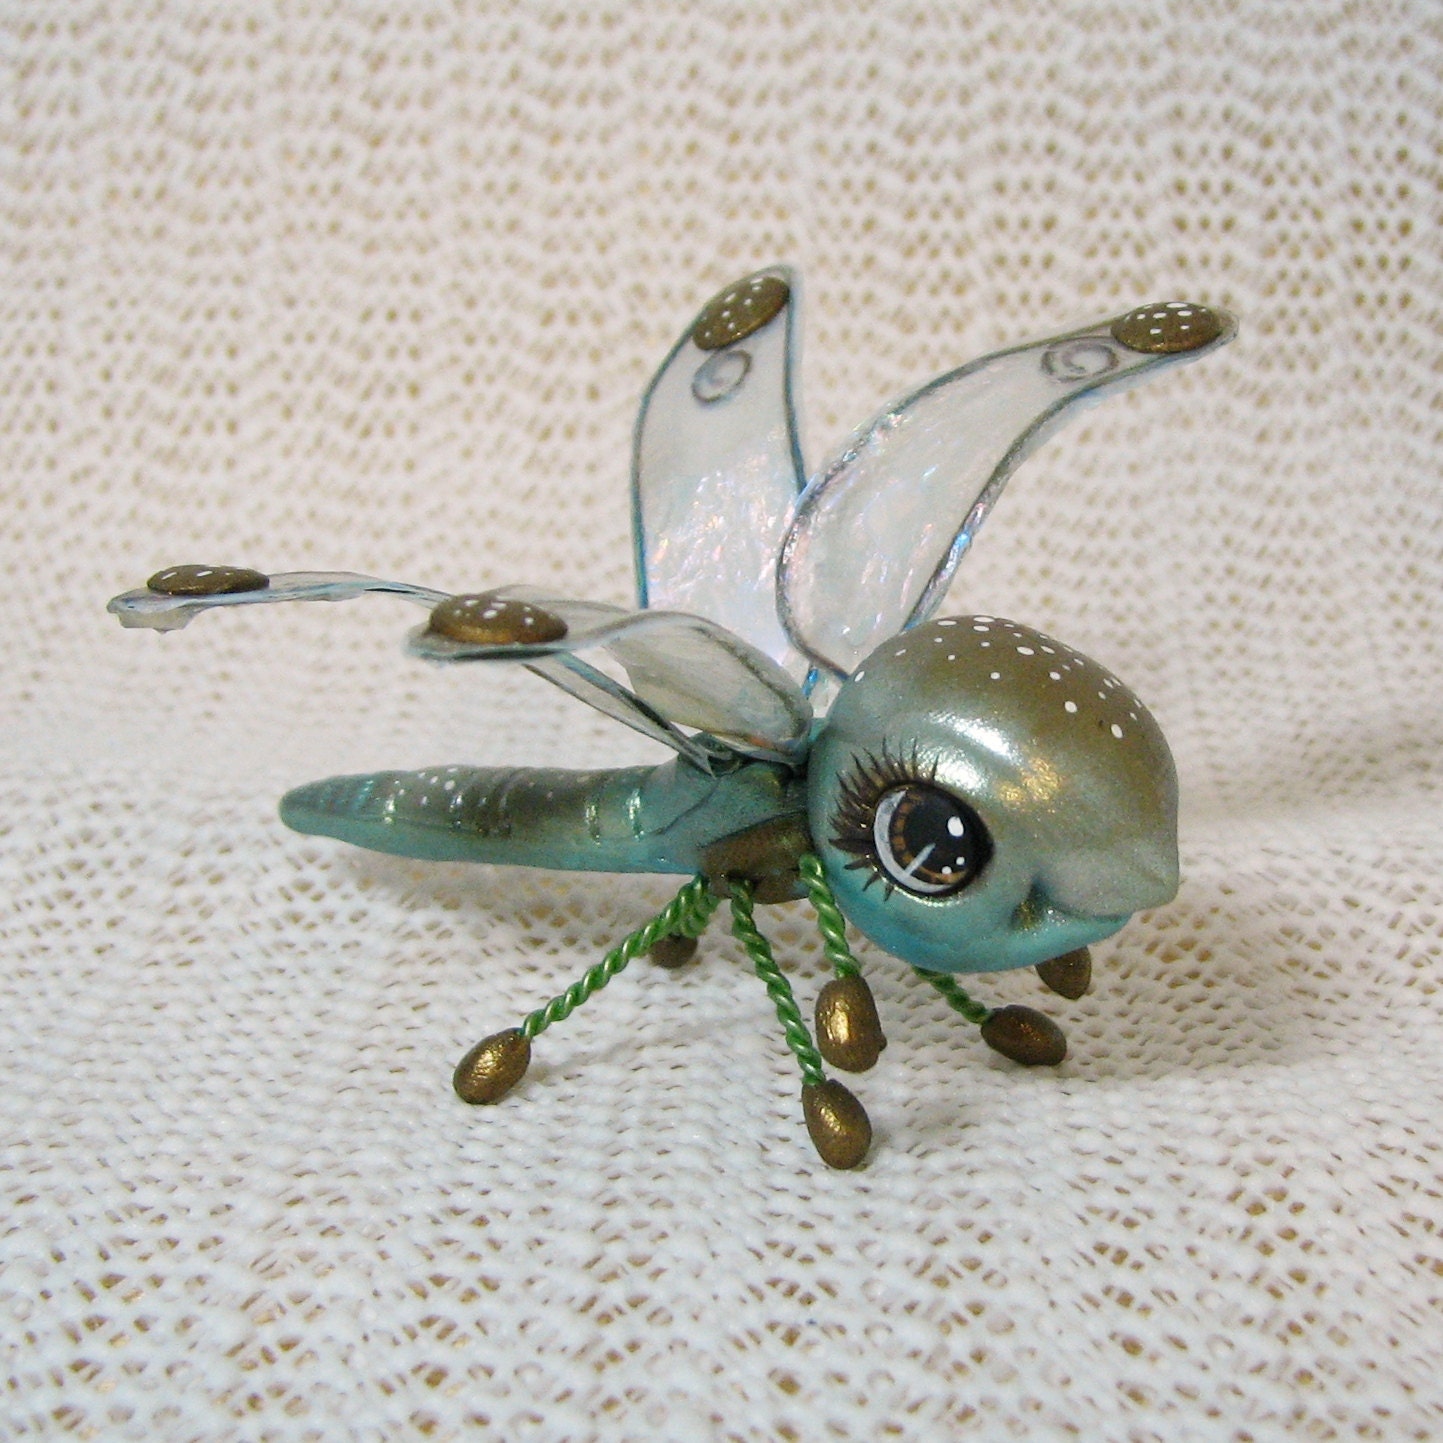
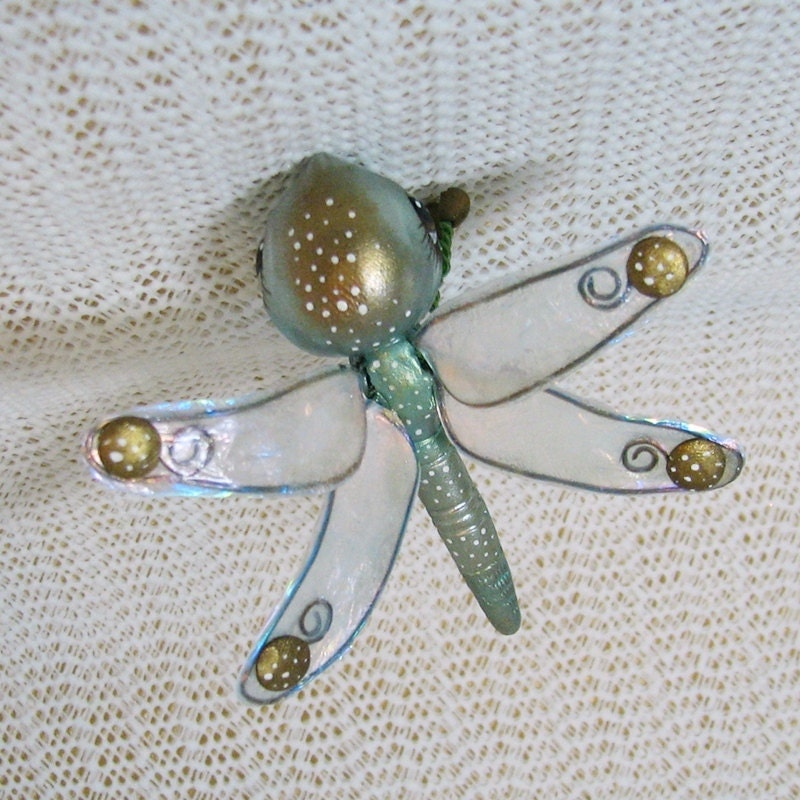
Chibitude Chibis are little collectibles, sit-abouts, bric-a-brac, chachkies or dust collectors. :o) They are meant to be enjoyed with the eye and with close attention to detail. They are created to be collected and live together in groups. Chibitude Chibis hope to make you and all who you share them with, smile and feel innocent childlike fascination. Can you live without a Chibitude Chibi??? Yes, but after you’ve seen one in person, you’ll ask yourself why you ever did. ;)
July 30, 2011
Chibitude Update!


July 29, 2011
Chibitude Emergency Sale!!
|


July 27, 2011
Really????
I don't know....is this gross? Is this sick? Is this smart? or Neat? I just don't know what to think. I'm not sure why this surprises me, when I myself made a rhinovirus a few years ago. Anyhoo, Check them out.
July 19, 2011
New Chibitude Amigurumi
| |||||||||

July 15, 2011
Doll Stand for Wednesday Addams
Here is the design that I'm shooting for. My commissioner came up with the idea, I added the little pebble walkway.
 First thing I needed to do was to create the doll stand for Wednesday. I used black galvanized wire.
 Once I had the shape I wanted, I covered the part of the wire that will be exposed with black yarn.
 Then I covered the yarn with fabric stiffener mixed with black paint and smoothed down the fuzzies. :o) Some yarn is nice and smoother and others are kind of frizzy.
 Once this was dry, I bent little nooks into the wire base so that I could screw it down to the wooden bottom.
 Then I secured it to the base using brass screws. These little screws are so hard to find. I need to remember to add this to My Own Honey-Do List so that I don't forget.
 Next I started the tombstone. The original drawing, I had a cross on the top, and with this commissioner, I try not to make any decisions without running them by her, but I needed to move forward today and usually don't hear from her until late in the evening. So I removed the cross from the top because I was worried about the structural issues and put the cross into the design on the tombstone.
 That's a piece of floral tape wrapped around it. There is a wire stand being glued to the back, and I didn't want it to move until it was dry. I'm using e-6000 so it will be a while until the piece is ready to handle. This is going to go into the oven, and to be honest, I'm not sure how the e-6000 is going to work. I know I shouldn't heat it, but hopefully the heat isn't too high and it will be ok.
 Both are attached to the wooden base now with screws. Don't mind the pattern on the wood. I have been drawing on this piece for a while now and it's the only piece of wood I have that's the right size and shape for this project.
 The ground, cobblestone walk and dirt pile has been added. The walkway looks shiny because the paint's still wet. The piece is in the oven now. In this picture it hadn't been baked yet. I like to paint the base coat before baking so that the heat will help to set it. Once the whole thing has cured and cooled, I'll dry brush greens in certain areas to make it look like grass, and browns in others, as well as grays on the stones.
 All the painting has been done. I hope the commissioner likes this! :o) One more pic below.
 stats:
base: 5 hours
price: $50
doll: 24 hours
price: $85
shipping & handling: $7.90
image source: http://chibitude.com/gallery/thumbnails.php?album=29
base: 5 hours
price: $50
doll: 24 hours
price: $85
shipping & handling: $7.90
image source: http://chibitude.com/gallery/thumbnails.php?album=29
Don't Ever Get Proud
That's a new rule that I have for myself. Because when I do, God reminds me that I am NOT as accomplished as I had thought.
And another rule is, "If you're not 100% happy with something, fix it." Today I was reminded of this issue as well.
Jessica's wig is the subject of the deep deep philosophical discussion...lol. When I made it, I set it using pin curls and the curls came out nice, but they were too tight to the top of her head. Also because the doll I was rewigging wasn't made by me, that meant the head shape was made to match my wigging style which resulted in the look of less hair than I hoped for. But I thought I could make it work.
I was wrong. Even though it looked cute, I wasn't happy with it for the reasons mentioned above. And this morning when I went to pack her to ship, I saw that her hair had flattened out and her curls weren't like they were. And this is because I didn't put enough spray on it.
And why didn't I put enough spray?? I'd say that subliminally, I knew I wasn't 100% happy and wanted to leave myself room to fiddle with it some more.
Next time -- no putting off the inevitable. Fix it right then an there. And quit thinking, "Oh, I'm good at this, I can make it work".
Here's Jessica with her new wig being set. Notice this time I set it using rollers instead so that the top of her hair could be straight and fluffy like the original hair style.


Her hair has dried, and her style has been completed. I am SO MUCH HAPPIER now. I feel like I did a good job now. Here are her updated photos :o)


And another rule is, "If you're not 100% happy with something, fix it." Today I was reminded of this issue as well.
Jessica's wig is the subject of the deep deep philosophical discussion...lol. When I made it, I set it using pin curls and the curls came out nice, but they were too tight to the top of her head. Also because the doll I was rewigging wasn't made by me, that meant the head shape was made to match my wigging style which resulted in the look of less hair than I hoped for. But I thought I could make it work.
I was wrong. Even though it looked cute, I wasn't happy with it for the reasons mentioned above. And this morning when I went to pack her to ship, I saw that her hair had flattened out and her curls weren't like they were. And this is because I didn't put enough spray on it.
And why didn't I put enough spray?? I'd say that subliminally, I knew I wasn't 100% happy and wanted to leave myself room to fiddle with it some more.
Next time -- no putting off the inevitable. Fix it right then an there. And quit thinking, "Oh, I'm good at this, I can make it work".
Here's Jessica with her new wig being set. Notice this time I set it using rollers instead so that the top of her hair could be straight and fluffy like the original hair style.
Her hair has dried, and her style has been completed. I am SO MUCH HAPPIER now. I feel like I did a good job now. Here are her updated photos :o)

July 12, 2011
New Chibitude Amigurumi
| |||||||||
xoxo Maddy
| |||||||||

Rewigging Project
There is a love of dolls that is so great that one will get their favorite dolls "revamped" from time to time. I think this is wonderful, and am so thrilled to be able to help in this area when my skills are applicable. Various things may happen to your doll over it's lifetime, hair losing it's curl, accidents, mishaps etc. So much better to have your doll repaired or restored than to just give up on your little cutie.
This project I'm rewigging two very loved dolls. The girls (dolls) seem to be happy to be at the beauty salon...LOL
I'm creating a post because I wanted to show my progress with this project.
The two dolls that I received were different sizes, and because they were also different materials I decided to wig them on dummy heads instead of directly on the doll. One of them is some form of air dry clay or plaster and the other seemed to be a polymer but with a glaze that I'm unfamiliar with.
I used alligator clips on lollipop sticks with aluminum foil to match the size of the dolls head. I then covered the foil with plastic and secured with twist ties.
Here you can see that I've done the base wigging for both dolls. The doll on the right is Jessica from true blood, and the one on the left is Emma from Glee.
I've set both wigs and they are in the process of drying. The Emma doll has a cute hair style that is parted on the side and curls under around her face. Her curlers are cut pieces of straw, and the clips that I'm using are little miniature pincher clips that you can use on a child hair.
Jessica's wig is being set using pin curls. They are twisted and then rolled into little buns. Her hair is quite long and the curls are meant to only be at the ends of the hair, so when I remove this setting, I will more than likely need to loosen up the curls around the crown of her head.
Emma's hair is dry and ready to style. She's quite anxious to have her new hair :o)
I've removed her rollers and as you can see, the curls are nice and tight. Now is when I'll cut the hair. This way made it easier to roll and I didn't have to worry about the ends.
The hair is cut and styled, and has a finish on it to hold the style. Now I'll remove it from my dummy head and put it onto Emma's head.
And here she is with her new hair-do. She seems quite happy :o) I'm very pleased with this method of rewigging. It was much easier than trying to fight with the doll to get them to keep still. They're very fidgety when you're trying to style or roll the hair. Even during cutting too.
Jessica's wig is dry and ready to start work on now too. First I remove the pins and let the curls loosen.
And now you know how to do a hairstyle for Medusa! LOL...just teasing. Next I need to pull the curls apart using my fingers and a smooth needle. If this hair would be combed, well...do you remember Rosanne Rossannadanna? If you don't, take a look here. http://disorderlydiversions.blogspot.com/2011_01_08_archive.html
And here she is with her new wig, very happy with her curls. :o) I had to finger comb it for quite a while to get the curls to lay in the right place. Then her hair was trimmed and it's been sprayed to hold the style.
Thanks for following along with me :o)
xoxo
stats:
4 hours per wig
$40 per wig
This project I'm rewigging two very loved dolls. The girls (dolls) seem to be happy to be at the beauty salon...LOL
I'm creating a post because I wanted to show my progress with this project.
The two dolls that I received were different sizes, and because they were also different materials I decided to wig them on dummy heads instead of directly on the doll. One of them is some form of air dry clay or plaster and the other seemed to be a polymer but with a glaze that I'm unfamiliar with.
I used alligator clips on lollipop sticks with aluminum foil to match the size of the dolls head. I then covered the foil with plastic and secured with twist ties.
 |
| source: http://chibitude.com/gallery/thumbnails.php?album=27 |
 |
| source: http://chibitude.com/gallery/thumbnails.php?album=27 |
Jessica's wig is being set using pin curls. They are twisted and then rolled into little buns. Her hair is quite long and the curls are meant to only be at the ends of the hair, so when I remove this setting, I will more than likely need to loosen up the curls around the crown of her head.
 |
| source: http://chibitude.com/gallery/thumbnails.php?album=27 |
 |
| source: http://chibitude.com/gallery/thumbnails.php?album=27 |
 |
| source: http://chibitude.com/gallery/thumbnails.php?album=27 |
 |
| source: http://chibitude.com/gallery/thumbnails.php?album=27 |
 |
| source: http://chibitude.com/gallery/thumbnails.php?album=27 |
 |
| source: http://chibitude.com/gallery/thumbnails.php?album=27 |
 |
| source: http://chibitude.com/gallery/thumbnails.php?album=27 |
Thanks for following along with me :o)
xoxo
stats:
4 hours per wig
$40 per wig
July 11, 2011
My Own Honey-Do List
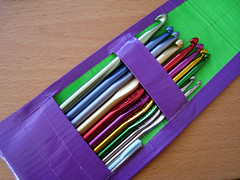 Image by Dvortygirl via Flickr
(original start day 07/05/2011)
Yup, I'm making one for me...LOL. I just have little projects that I forget to get around to that aren't urgent, or even important, and I want to remember them.
1. Make a soap dish....research on the net for a good idea and make it.
2. Make a block like my wing block, but bigger that can hold my most often used tools. That can sit on my desk while I sculpt. With the usual suspects, liner brush, eyebrow comb, clay shapers, needle tool, x-acto knife, wooden tool.
3.

5. A really cute pin cushion that will fit inside of my sewing box. Make sure to use wood at the bottom so that the pins do not go all the way through and poink me.
6.
http://www.achildsdream.com/wool_felt/holland_wool_felt.htm
http://www.weirdollsandcrafts.com/wool-felt/wool-felt-100.html
7. Look for bulk embroidery thread for sale. Used, so that the price is lower.
8. Look for bulk crochet thread....and keep looking. I need more colors but can't afford to pay much.
9.

10.
11. In the movie "I remember Mamma" the oldest daughter wants a hair receiver. I'd like to make one of those to use with my viscose. Would be neat if I could make one that has a separate place for each color of hair (something that wasn't necessary in the original design)
July 10, 2011
Wednesday Friday Addams WIP
I started working on this doll on Monday. I gave myself a week to finish her, but I didn't quite make it. I need to get myself moving faster. :o)
Anyways, here are progress pictures of her as I've been moving along.
 I tried something a little different this time. Long ago when I did fairies I used this technique, but had since moved on. What I did was only sculpted the bottom of the eyes. This way I have more options when it comes time to paint. She looks like her eyes are closed, and that's why. It's funny how she looks kind of messy before she's baked. But just like the rest of us women, makeup does wonders :o) As you can see in the next picture.
 I'm totally happy with these eyes. I know people say don't ever use white for the whites of the eyes when making dolls. I say Hogwash!! I want my eyes to pop, and white makes them pop! Of course realism isn't what I aim for. More of a fantasy world kind of look.
 Here she has her hands and feet finished and her body has been made. In case you're curious, her body is made of cloth covered floral wire and then wrapped with pipe cleaners. This way it can be posed easily but still hold it's shape. If you've seen my videos, you might notice that I use superglue to glue the armature into the hands and feet before I bake them. This is another step that I do to make the clay secure.
 Here she has her striped stockings on. Wednesday didn't really wear this kind of stockings, but with so much black on her outfit, it seemed like a good choice to add a little flair to the fashion. The stockings are made by wrapping the wires with crochet threads. The reason that I do this is so that the legs can still be bent without any restriction. If I had used a material that ran vertically on the leg instead, this would limit the movement because of the scale of the doll.
 These are two quick little sketched I did on the computer to try out different design ideas for her clothing. I used my graphics tablet and Ulead PhotoImpact software to do the drawings. I showed this sketch to the commissioner and she preferred the design on the left. So that's what I attempted to do.
 I've used my satin flesh thread to bulk up her upper torso. She's ready to be dressed now.
 Here are her little shoes. They are made out of felt and polymer clay. The soles being polymer. I still need to add the laces. I've been putting this off. I'm worried that if I pierce the felt it will rip, so in the back of my mind I've been trying to work out another way to accomplish the task.
 Ok.....now let me explain something. My husband gets upset we me (and rightly so) because he says that I don't listen to him. I totally do listen. But you know, I sometimes think to myself, "Oh, I can make that even better than what we discussed and surprise him". And you know what happens? He's disappointed because he wanted things the way we talked about them. Darn me, why do I do this???
Anyhow, that's what you're seeing here. Me, in my constant attempt to do better than expected attempted to duplicate Wednesday Addams dress from the movie. That is the exact print that was used on her dress. This dress isn't finished, didn't do the cuffs or collar. But after I did it, I realized it looks crappy. Just not right.
And I had to show my commissioner just in case she liked it, I'd hate to take an option away. Needless to say it's NOT what she wanted, so this little dress is in my stash for another doll later. :o)
 This is Wednesday's new dress. It's made out of felt and cotton. It looks like wool, and although I've not hear from her commissioner yet, I think it looks much better.
 And here she is with her buttons. I used polymer clay to make the little buttons. They are glued on because they are tiny. I trimmed the shape of her skirt as well.
 I got myself into a tizzy tonight over her little headless doll. I didn't want to make it out of clay because then it wouldn't look like a doll, because it would look the same. So I wasted all day today being freaked out about her little doll. I even got bummed out and went to sleep for a good 6 hours.

Then I went out and talked to hubby and together we came up with this sweet little doll. Now I think it's perfect and am super happy with it. It's a little hard to see because of the black and white. It's made out of pipe cleaner that I covered in felt and then threaded over it. The collar is made of cotton and the buttons are made of laminated cardboard.
 Here's a better picture of the doll. I put it in my hand so you could see the size as well as the contrast. Cute huh? I like it.
 Her shoes are laced and I really need to start trusting myself. They were perfect to do and quite sturdy since I used the fabric stiffener on the felt as well as a coat of black acrylic paint. I stressed for nothing. The only thing left to do is to wig little Wednesday. And since I gave myself today as a deadline, even thought it's 11:20 pm, I'd better get busy.
 Wednesday is in her CFSW and ready to start getting wigged. I do this to protect her clothing from loose hair. Just like when you get your hair cut. :o)
 Here I've started her hair. Wednesday wears her hair in two braids so wigging a doll like this is almost like making two wigs. One for each side of her head. The key to a nice wig is to be sure that there are no ends showing around the hairline. In this picture it looks like I've got lots of hair ready to do the right side of her head, but the fact is all of that hair is for the left side. It will be pulled and flipped over to show a nice part line down the center. (I hope!!!) :o) Blogging and photo taking while I sculpt helps a lot because it gives me the patience to wait for glue to dry. ;)
 I sure wish this picture would have come out better, but it is what it is...LOL Here you can see where I've pulled all of the hair on her left over to form the pigtail. See the nice-ish straight part?
 And here's what it looks like from the left. So far so good. :o) I'll be happy when I can get her hair all finished. There's one thing I do not like about wigging. It's all the fly-aways!!! There are little black fibers floating through the air and on everything! And then when it comes time to pull out the clay there are little fibers that get caught in it. No matter how hard I try I can never get them all up. Poooooh!
 And here is the right side of her head waiting for the glue to dry. I don't know if anyone noticed but I'm wigging this doll a little differently than usual. I usually use the little wefts, but today felt pressured to get on schedule so I forgo that step and went straight from hank to head. It actually worked quite well, and if you decide you'd like to try this method, I will share some tricks here at a later date: Non-wefted Viscose Application.
 As you can see I didn't get the part as close together as I would have liked. So it's time for a little "fixing".
 This might look a little worse to you, but what I did was to put a line of glue down the hair line and then press the hair into the glue. Once it has dried I will then attempt to smooth it out again.
I love when I get the hair finished and can take her out of her CFSW. It's like opening a present :o) Below are some more pictures of her. Click to enlarge these ones.


 All in all I enjoyed making this doll. I do have to say that I wasn't fond of my self imposed time frame. Made me feel a little pressured. But it's really fun to make something that I'd never think of making. I hope you like her and enjoyed following along.
Stats:
started: 07-05-2011
finished: 07-11-2011
sale price: $75 + s/h
Anyways, here are progress pictures of her as I've been moving along.
Anyhow, that's what you're seeing here. Me, in my constant attempt to do better than expected attempted to duplicate Wednesday Addams dress from the movie. That is the exact print that was used on her dress. This dress isn't finished, didn't do the cuffs or collar. But after I did it, I realized it looks crappy. Just not right.
And I had to show my commissioner just in case she liked it, I'd hate to take an option away. Needless to say it's NOT what she wanted, so this little dress is in my stash for another doll later. :o)
Then I went out and talked to hubby and together we came up with this sweet little doll. Now I think it's perfect and am super happy with it. It's a little hard to see because of the black and white. It's made out of pipe cleaner that I covered in felt and then threaded over it. The collar is made of cotton and the buttons are made of laminated cardboard.
I love when I get the hair finished and can take her out of her CFSW. It's like opening a present :o) Below are some more pictures of her. Click to enlarge these ones.
Stats:
started: 07-05-2011
finished: 07-11-2011
sale price: $75 + s/h
Subscribe to:
Posts (Atom)